| .meteor | ||
| .vscode | ||
| client | ||
| docs/images | ||
| examples | ||
| imports | ||
| private | ||
| public | ||
| server | ||
| .gitignore | ||
| LICENSE | ||
| mobile-config.js | ||
| package-lock.json | ||
| package.json | ||
| README.md | ||
| tsconfig.json | ||
| tslint.json | ||

Rdio Scanner - v1.0.0
Rdio Scanner uses the files created by Trunk Recorder and offers them in a nice web based interface, inspired by my own personnal use of police radio scanners.
Features
- Built to act as a real police radio scanner
- Listen to live calls queued to listen
- Hold a single system or a single talkgroup
- Select talkgroups to listen to when live feed is enabled
- Search past calls stored in the database
- Just upload Trunk Recorder files with Curl
This is the first version and many features still need to be developed, such as controlling user access, creating mobile apps. Yes, the same code can be used with the integration of Cordova in Meteor, you can use the same code and run it on an iOS or Android device.
Screenshots
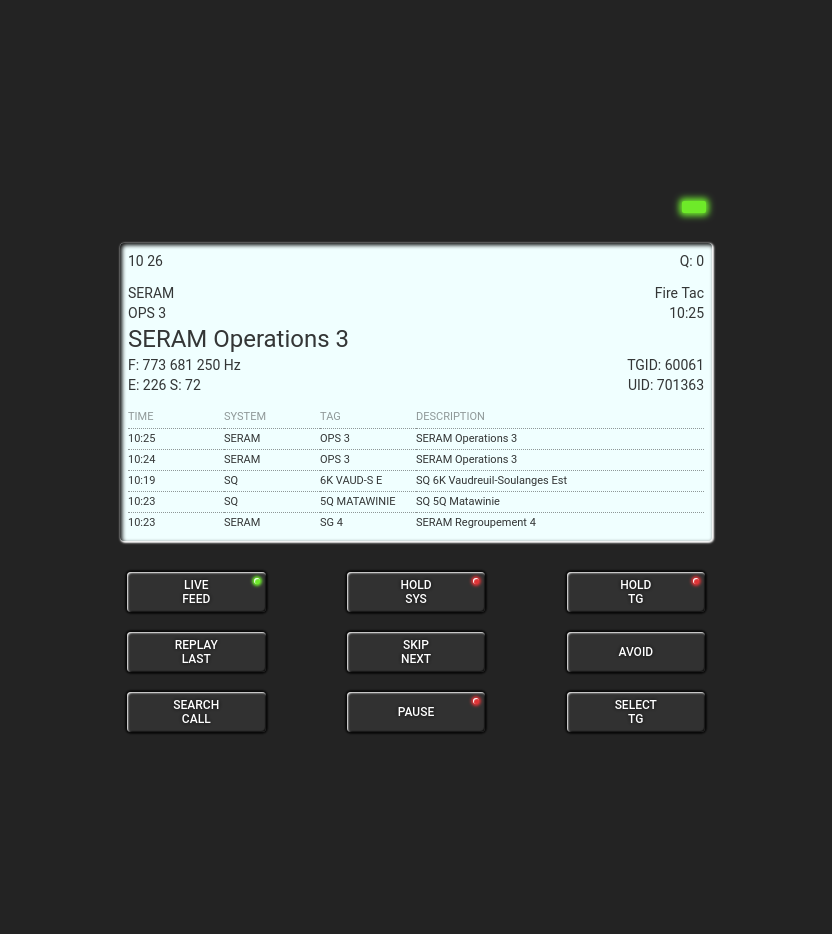
The main screen displays information on associated calls, such as on a real police radio scanner:
- Real time clock
- (Q:) calls waiting to listen
- System name, alpha tag, tag, group, call time and talkgroup description
- (F:) trunk frequency that changes during the call
- (S:) Spikes from trunk Recorder
- (E:) Errors from Trunk Recorder
- (TGID:) Talkgroup Id
- (UID:) Unit Id which changes throughout the call
- Call history containing the last five calls
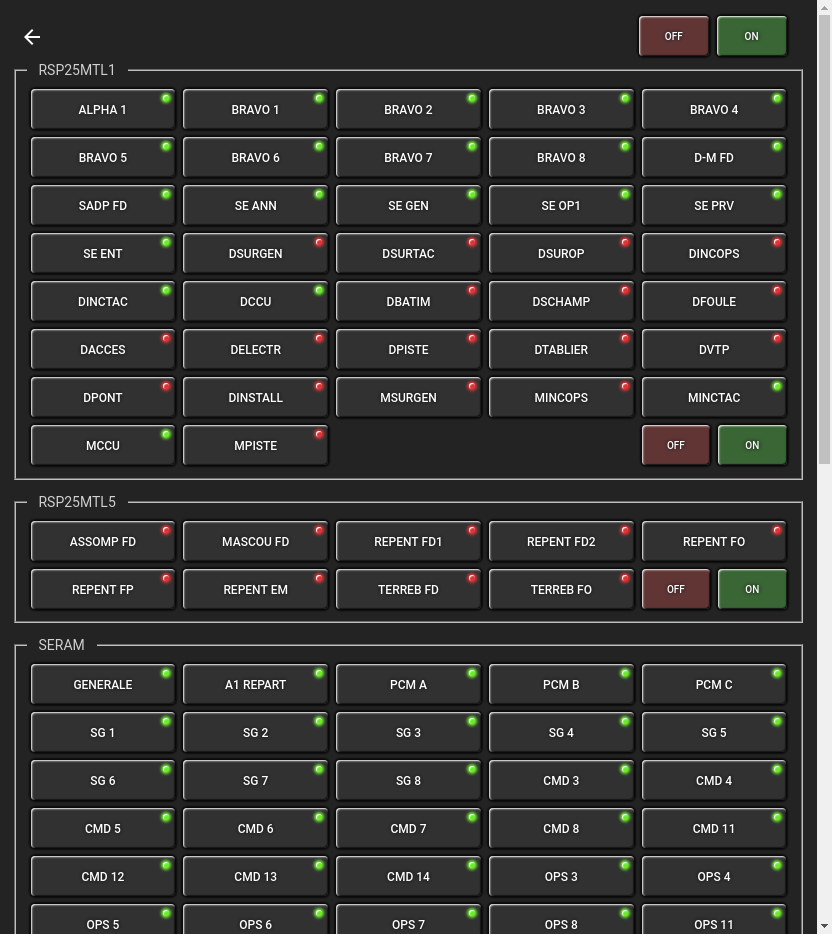
The talkgroups selection pane which can be opened by clicking the SELECT TG button on the main screen. You can toggle individual talkgroups, or by group. This only has impact on the live feed.
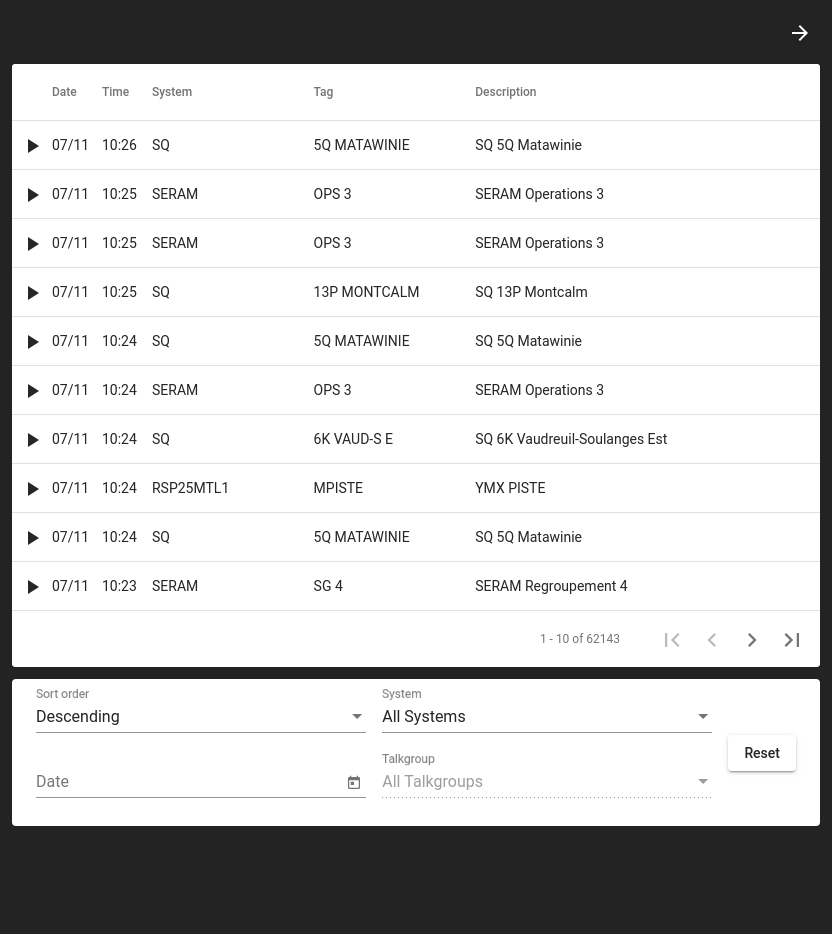
The call search pane is opens by clicking the SEARCH CALL button of the main screen. You can search for calls thrughout the database, regardless of the talkgroups selected in the talkgroups selection pane.
Build and Install
Please follow the Meteor Guide for Custom Deployment instructions to have your own running installation.
Everything was built on a Fedora workstation and run in staging/production on a Debian server.
Requirements for your development workstation
- Git
- Node.js
- Meteor
Requirements for your staging/production server
- Apache Web Server (NGINX can also be used)
- Node.js
- MongoDB
Development workstation quickstart
$ git clone https://github.com/chuot/rdio-scanner.git
$ cd rdio-scanner
$ npm i
$ npm start
You now have a running Rdio Scanner local instance running at http://localhost:3000/ with a built-in MongoDB.
The runtime settings, like like those for the API upload key(s), are located in the private/settings.json folder.
If your Trunk Recorder instance is installed on an other server and you want to test your Rdio Scanner development instance, you can actually create a SSH tunnel to this server from your development workstation.
$ ssh -R 3000:localhost:3000 *your remote server*
Then use the upload scripts to upload on http://localhost:3000/ from your Trunk Recorder server, as if an instance of Rdio Scanner was running on that same server.
Build a staging/production package
Building a package is as simple as this, make sure you are in the Rdio Scanner git folder.
$ meteor build ../build
This will create a rdio-scanner.tar.gz file in ../build that you will need to transfer to your staging/production server.
Staging/production installation
Remember that your staging/production instance should(must) run behind a reverse proxy server. The examples folder contains files that will help you in this process.
examples/rdio-scanner.service
This is a systemd unit file that you willl need to copy (as root) to /etc/systemd/system and modify it according to your configuration. Runtime settings for Rdio Scanner are also included in this file. Make sure the API key(s) and the MongoDB url are correct.
Then activate it and start it.
$ sudo systemctl enable rdio-scanner
$ sudo systemctl start rdio-scanner
examples/htpasswd
This is an example of a .htpasswd file that you can use with an Apache Web Server to create a quick reverse proxy situation for your staging/production Rdio Scanner instance.
Unpack your Rdio Scanner package
Transfer the package on your server and unpack it somewhere. The example folder uses the /home/radio/rdio-scanner folder for it.
$ pwd
/home/radio/rdio-scanner
$ ls rdio-scanner.tar.gz
rdio-scanner.tar.gz
$ tar -xvzf rdio-scanner.tar.gz --strip-components 1
...
$ cd programs/server
$ npm i --production
$ sudo systemctl start rdio-scanner.service
Trunk Recorder upload
AUDIO and JSON files
Refer to the examples folder for upload scripts, and so on. Be careful, the first argument of the upload scripts is the system number.
$ ./upload.sh 2 /home/radio/trunk-recorder/audio_files/SERAM/2019/6/12/60067-1560345651_7.73431e+08.wav
Talkgroups files
The main display information are obtained from the database. You must provision the database by uploading each CSV file to Rdio Scanner with the talkgroups script from the examples folder.
$ ./upload.sh 2 /home/radio/trunk-recorder/SERAM.csv