
10 KiB
 \
\
\pagebreak{}
What is it ?
Rdio Scanner is an open source software that ingest and distribute audio files generated by various software-defined radio recorders. Its interface tries to reproduce the user experience of a real police scanner, while adding its own touch.
You can listen to Rdio Scanner on any modern browsers using the integrated web app.
Recorders compatibility
Rdio Scanner works with any radio recorder, as long as they can create audio files separated by conversations or transmissions.
Here is a list of recorders known to work with Rdio Scanner:
| Recorder | API | Dirwatch |
|---|---|---|
| Trunk Recorder | X | X |
| RTLSDR-Airband | X | |
| sdrtrunk | X | |
| voxcall | X | |
| ProScan | X |
Improve your experience on the go
You can enjoy your Rdio Scanner on the go on your mobile device with the native app.


\pagebreak{}
Quick start
ALWAYS DOWNLOAD THE LATEST VERSION OF RDIO SCANNER FROM ITS OFFICIAL REPOSITORY AT HTTPS://GITHUB.COM/CHUOT/RDIO-SCANNER. PRECOMPILED VERSIONS ARE LOCATED UNDER THE RELEASES TAB.
-
Make sure you have the latest version of Rdio Scanner.
-
Extract the contents of the archive somewhere on your computer. The configuration file and the database file will be created in this same folder.
rdio@macos ~ % mkdir rdio-scanner rdio@macos ~ % cd rdio-scanner rdio@macos rdio-scanner % unzip \ > ~/Downloads/rdio-scanner-darwin-arm64-v6.1.11.zip Archive: /Users/rdio/Downloads/rdio-scanner-darwin-arm64-v6.1.11.zip inflating: rdio-scanner inflating: rdio-scanner.pdf -
Run the executable.
rdio@macos rdio-scanner % ./rdio-scanner Rdio Scanner v6.1.11 ---------------------------------- 2022/02/13 08:38:06 server started 2022/02/13 08:38:06 main interface at http://macos.local:3000 2022/02/13 08:38:06 admin interface at http://macos.local:3000/admin -
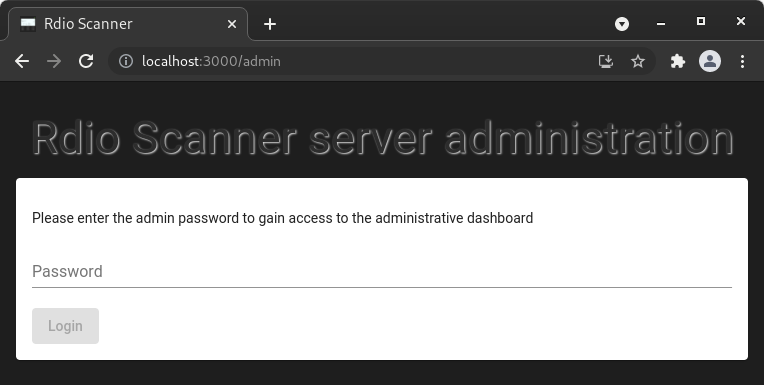
Access the administrative dashboard to finalize the configuration.
Note that the default password is rdio-scanner
 \
\
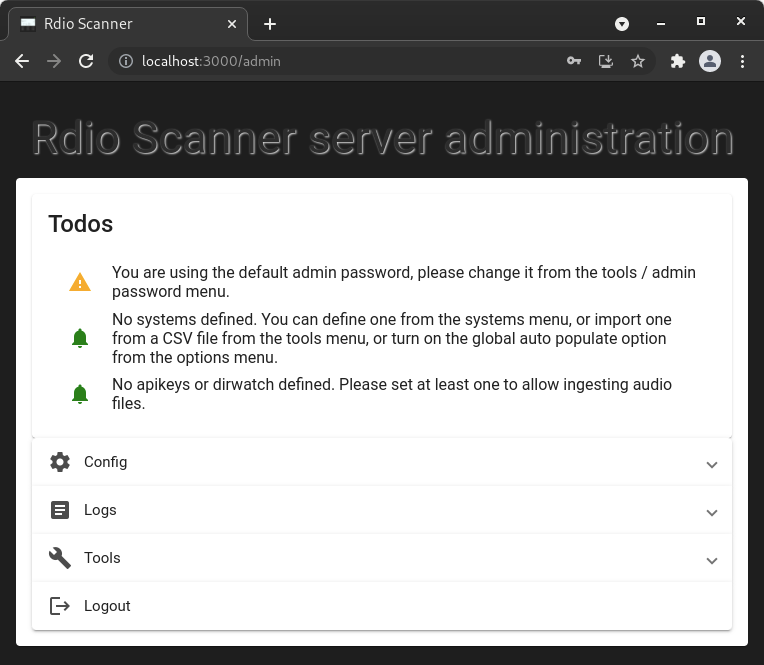
- Configure your Rdio Scanner instance.
 \
\
\pagebreak{}
Advanced customizations
Listening on an alternate port
Here we want our Rdio Scanner instance to listen for connections on the standard HTTP port.
    rdio@macos rdio-scanner % ./rdio-scanner --listen :80

    Rdio Scanner v6.1.11
    ----------------------------------
    2022/02/13 08:48:03 server started
    2022/02/13 08:48:03 main interface at http://macos.local
    2022/02/13 08:48:03 admin interface at http://macos.local/admin
Listening with SSL with self-signed certificates
It is advised to share your Rdio Scanner instance over the Internet by listening to a SSL port.
We can create such self-signed certificates by running Rdio Scanner with the -ssl_create argument.
    rdio@macos rdio-scanner % ./rdio-scanner -ssl_create
    2022/02/13 08:49:16 generating ssl certificate files
    2022/02/13 08:49:17 ssl files created
This has generated these files in the same folder as your Rdio Scanner executable.
- ca.crt - self-signed certificate authority.
- ca.key - certificate authority private key.
- server.crt - self-signed server certificate.
- server.key - server private key.
Now we use the self-signed server certificate to run our instance.
    rdio@macos rdio-scanner % ./rdio-scanner \
    > -listen :80                            \
    > -ssl_cert_file server.crt              \
    > -ssl_key_file server.key               \
    > -ssl_listen :443

    Rdio Scanner v6.1.11
    ----------------------------------
    2022/02/13 08:50:58 server started
    2022/02/13 08:50:58 main interface at http://macos.local
    2022/02/13 08:50:58 main interface at https://macos.local
    2022/02/13 08:50:58 admin interface at https://macos.local/admin
Save your advanced configuration to a config file
You don't want to have to type everytime a long list of arguments. No problem, you can save your advanced configuration to a file by adding the -config_save argument.
    rdio@macos rdio-scanner % ./rdio-scanner \
    > -listen :80                            \
    > -ssl_cert_file server.crt              \
    > -ssl_key_file server.key               \
    > -ssl_listen :443                       \
    > -config_save
    2022/02/13 08:52:24 rdio-scanner.ini file created
All of your parameters passed as arguments to Rdio Scanner have been saved to an INI file which has the same arguments/values list.
    db_file = rdio-scanner.db
    db_type = sqlite
    listen = :80
    ssl_cert_file = server.crt
    ssl_key_file = server.key
    ssl_listen = :443
Then simply run Rdio Scanner without any arguments.
    rdio@macos rdio-scanner % ./rdio-scanner

    Rdio Scanner v6.1.11
    ----------------------------------
    2022/02/13 08:54:08 server started
    2022/02/13 08:54:08 main interface at http://macos.local
    2022/02/13 08:54:08 main interface at https://macos.local
    2022/02/13 08:54:08 admin interface at https://macos.local/admin
Install Rdio Scanner as a service
Everything looks ok now, but you do not want to manualy start Rdio Scanner after every reboot. No problem, you can install your server instance as a service. Note that you will be required to proceed in a command prompt that is running as Administrator.
    rdio@macos rdio-scanner % sudo ./rdio-scanner -service install
    Password:
    rdio@macos rdio-scanner % sudo ./rdio-scanner -service start
    rdio@macos rdio-scanner % ps ax | grep rdio-scanner
    64627   ??  Ss     0:00.13 /Users/chuot/rdio-scanner/rdio-scanner -service run
    64630 s000  S+     0:00.00 grep rdio-scanner
\pagebreak{}
Get the full list of arguments
To get the whole list of arguments you can pass to Rdio Scanner, simply pass the argument -h.
    rdio@macos rdio-scanner % ./rdio-scanner -h
    Usage of ./rdio-scanner:
      -admin_password string
            change admin password
      -base_dir string
            base directory where all data will be written
      -config string
            server config file (default "rdio-scanner.ini")
      -config_save
            save configuration to rdio-scanner.ini
      -db_file string
            sqlite database file (default "rdio-scanner.db")
      -db_host string
            database host ip or hostname (default "localhost")
      -db_name string
            database name
      -db_pass string
            database password
      -db_port uint
            database host port (default 3306)
      -db_type string
            database type, one of sqlite, mariadb, mysql (default "sqlite")
      -db_user string
            database user name
      -listen string
            listening address (default ":3000")
      -service string
            service command, one of start, stop, restart, install, uninstall
      -ssl_auto_cert string
            domain name for Let's Encrypt automatic certificate
      -ssl_cert_file string
            ssl PEM formated certificate
      -ssl_create
            create self-signed certificates
      -ssl_key_file string
            ssl PEM formated key
      -ssl_listen string
            listening address for ssl
      -version
            show application version
    rdio@macos rdio-scanner %
\pagebreak{}
Need help ?
You can ask your questions or post your comments on the Rdio Scanner Discussions at https://github.com/chuot/rdio-scanner/discussions or on the Gitter Rdio Scanner Lobby at https://gitter.im/rdio-scanner/Lobby.
Show your appreciation, support the author
If you like Rdio Scanner, consider starring the GitHub repository to show you appreciation to the author for his hard work. It cost nothing but is really appreciated.
If you use Rdio Scanner for commercial purposes or derive income from it, consider sponsoring the project to help support continued development.
Commercial support
Commercial support is available at https://saubeo.solutions/.
Happy Rdio scanning !
\pagebreak{}